Pro Tips #54
Today I will talking about LSAgent, Lansweeper’s endpoint scanning agent. – It’s super lightweight. It’s designed with simplicity in mind. It’s stable and reliable – so much so in fact, that I really hesitate in calling it an actual ‘agent.’ It also sends data to your Lansweeper Scan Server and Site Installation (if linked) as long as the device is online and the ‘Cloud Relay’ feature is enabled.
There is one slight limitation, however – the scanning frequency or flexibility. With all things Lansweeper, where there’s a will, there’s a way – in this specific case, to gain greater control over when LSAgent performs scans!
In today’s pro-tip, I will be putting Esben’s “You can pretty much write about anything you want” promise to the test – and show how you can use Powershell in conjunction with Active Directory Group Policy to get Lansweeper’s agent (LsAgent) to scan a windows computer at every user logon – in a simple, yet totally unsupported way (is there any other way to do things?).
Let’s get to it.
The ‘Fine Print’ and Pre-Requisites
Make Sure You Have Enough Free Memory on Your Scan Server
LsAgent scanning takes a little bit more resources for the scanning server(s) to process – which is why the minimum scan interval is hourly. At minimum, you will need either 1GB or 10% of free memory on your scanning server in order to process the LsAgent scans. I recommend at least 4GB free on your scan server to comfortably do this – however if that’s not possible, you can stand up an additional scan server to process/offload LsAgent requests.
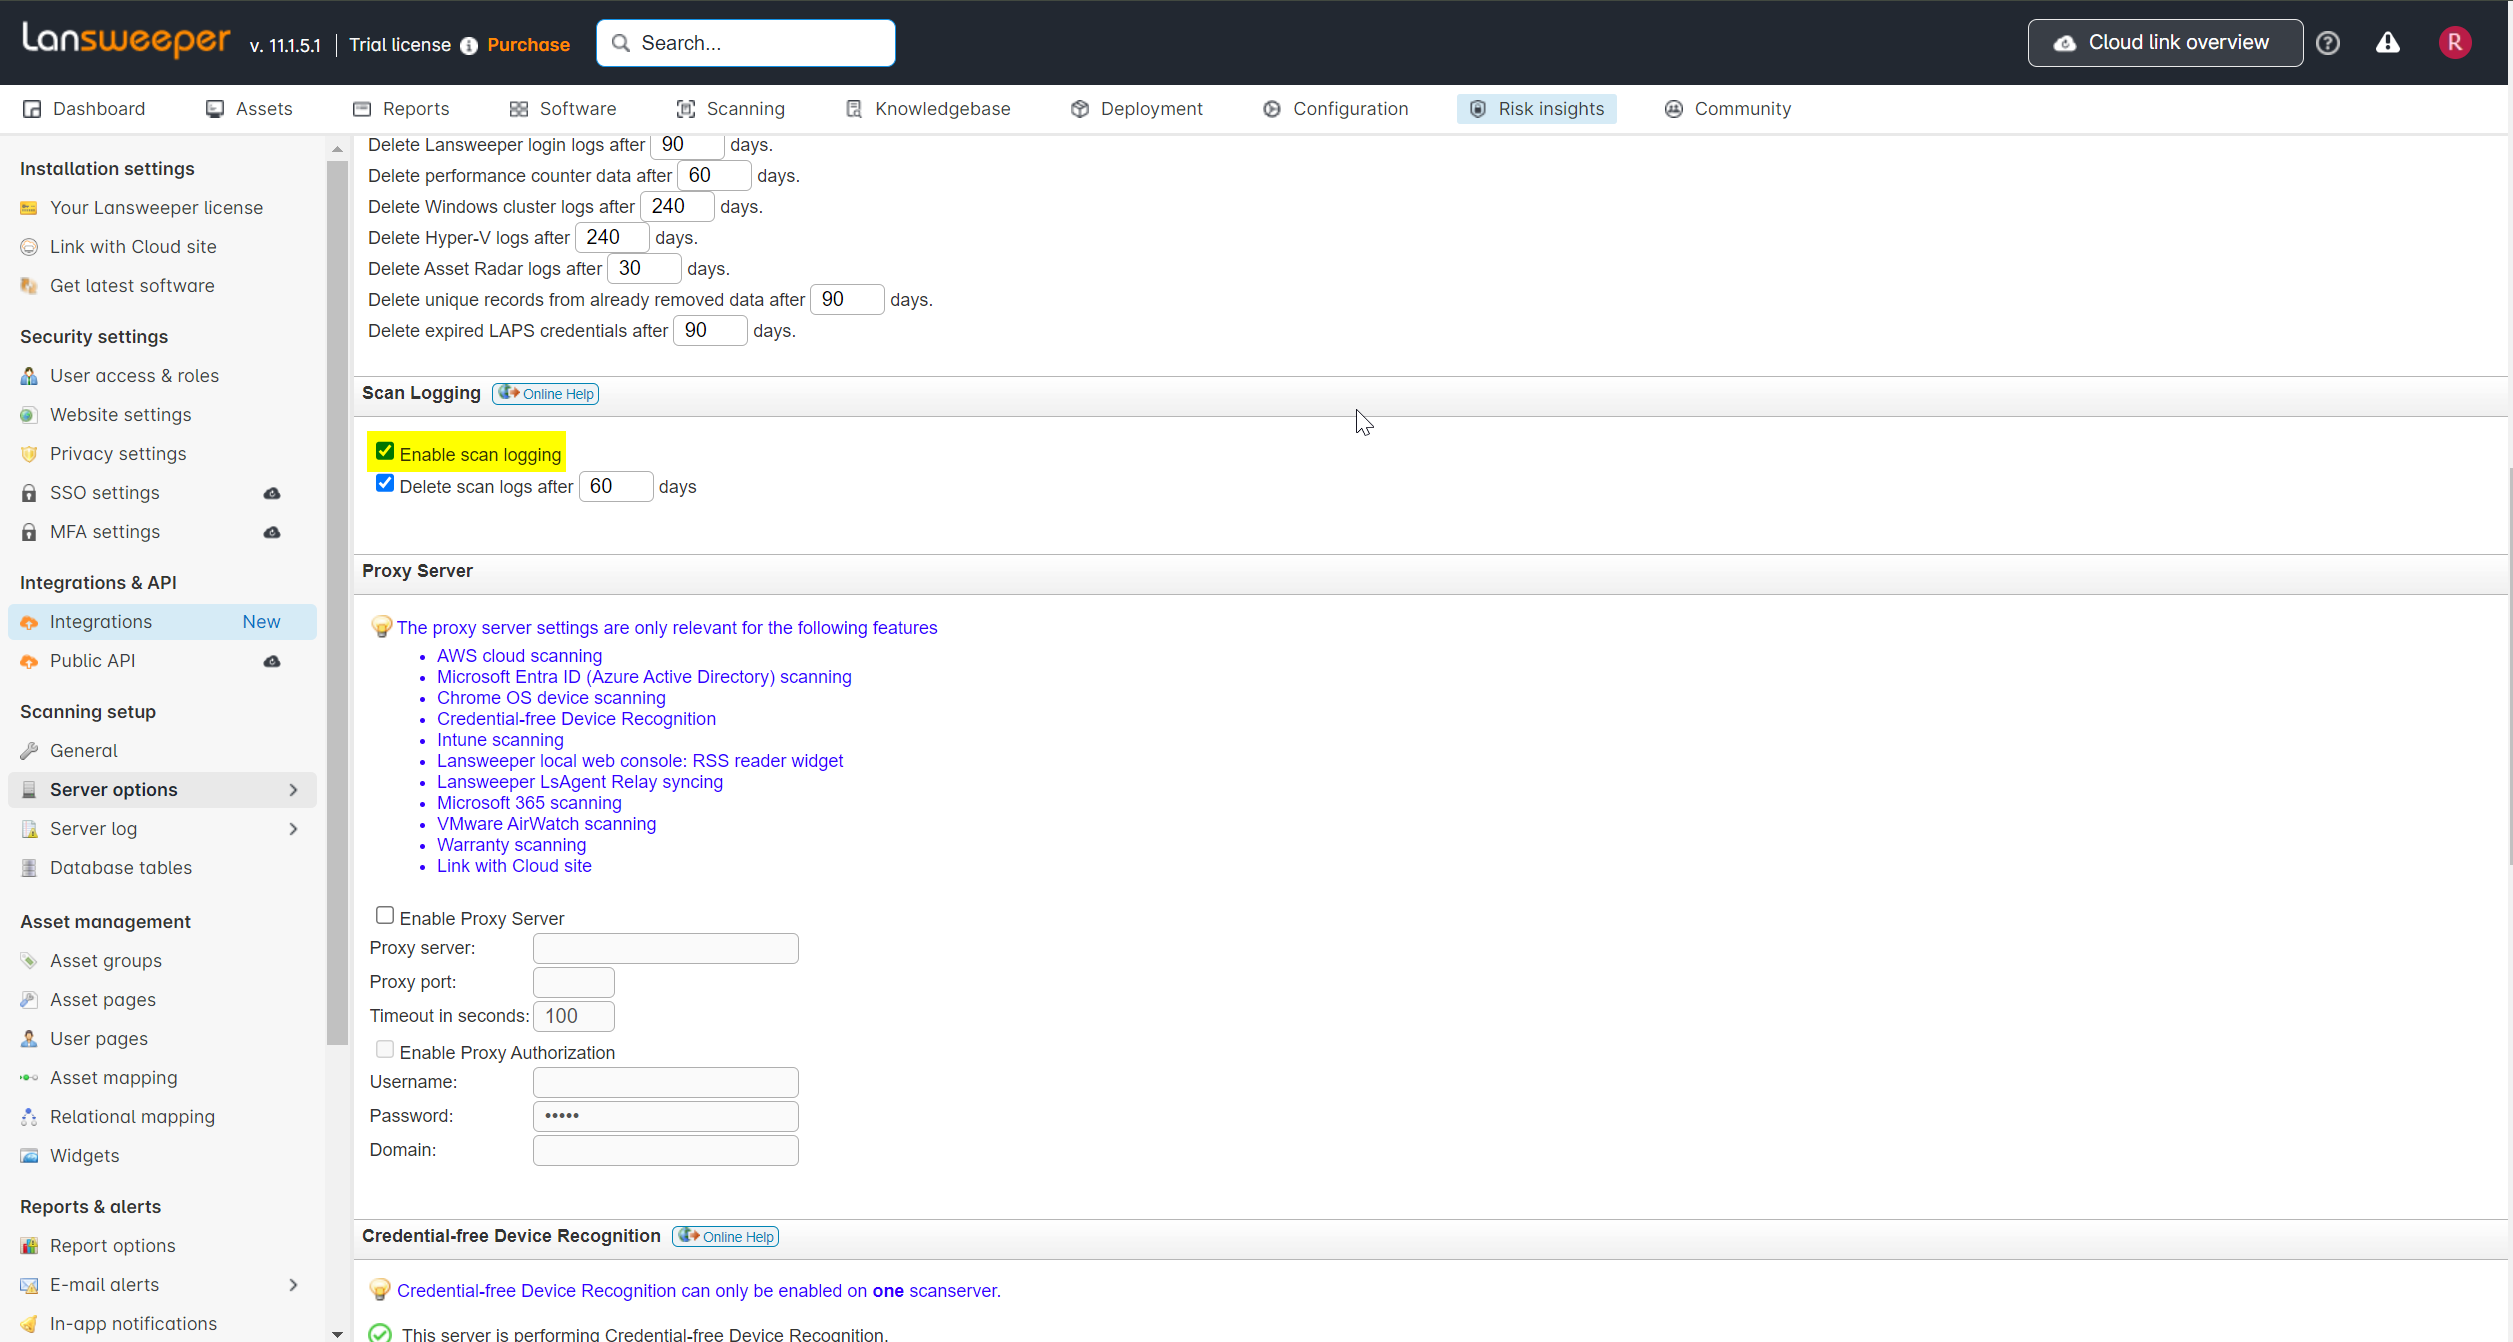
Enable Scan Logging
If you would like to log scanning activities, you can do this by enabling scan logging under Configuration\Server options, section Scan logging.
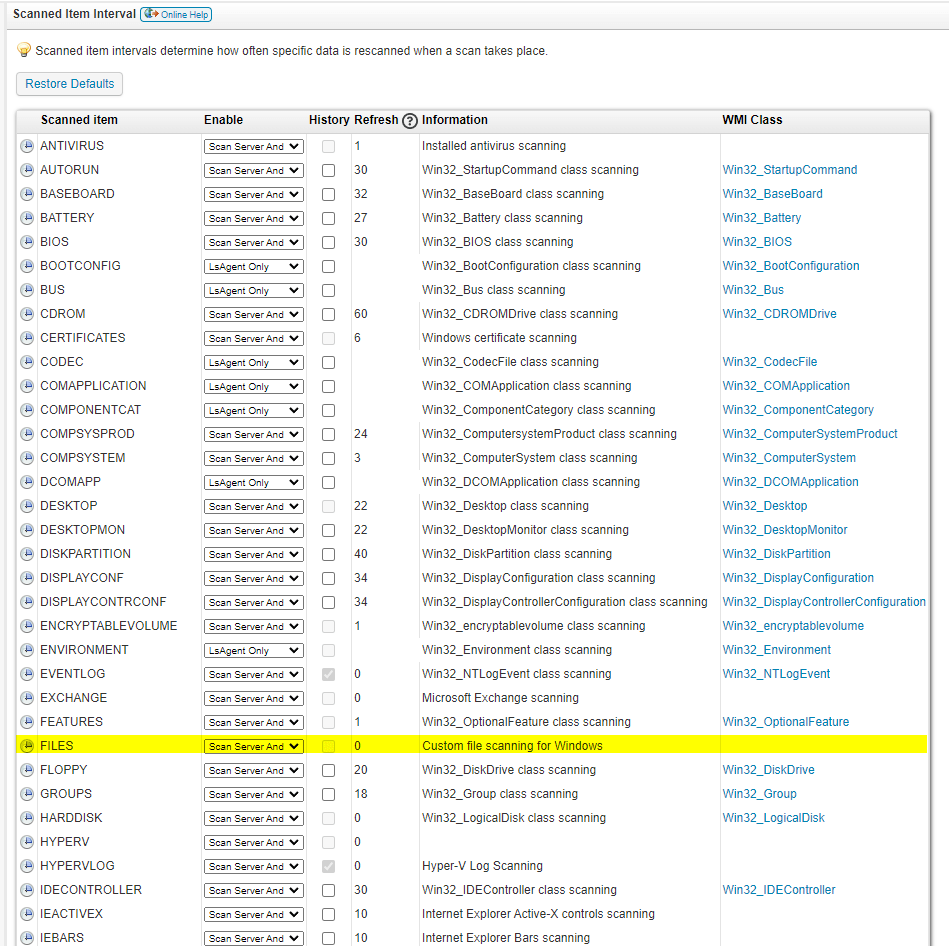
Set File Scanning Item Interval
In order to have accurate file scan monitoring, you will need to set the ‘Refresh’ scanned item interval for the ‘FILES’ line item to 0. This can be found under Scanning > Scanned Item Interval:
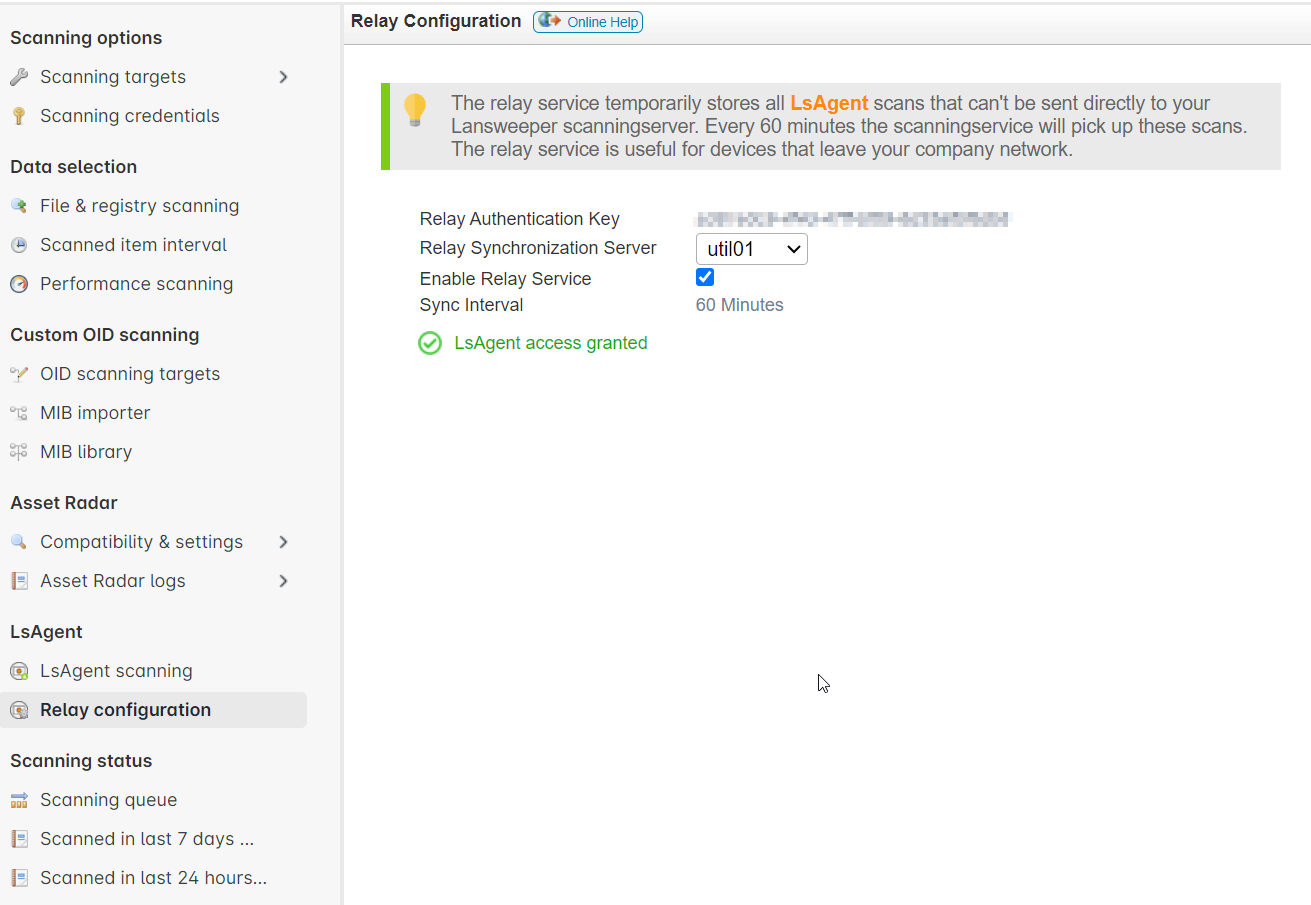
(Optional) Enable Cloud Relay
In order to have LsAgent send scan information while off network, you will need to enable the Cloud Relay (Scanning -> Relay Configuration), and add --agentkey {your key guid} to your install script/command. (Example: “LsAgent-windows_11.1.10.0.exe" --mode unattended --server 1.1.1.1 --agentkey b511c0z6-2g3j-69ee-hu52-2t62tnrh8eb2)
Download The PowerShell Script
This PowerShell script stops the Lansweeper Agent service, modifies its configuration file (lsagent.ini) to remove the scan time entry lines, restarts the service to initiate a scan, logs all actions to a weekly log file, and writes to an error log if any errors.
Download LSAgent Service Management Script
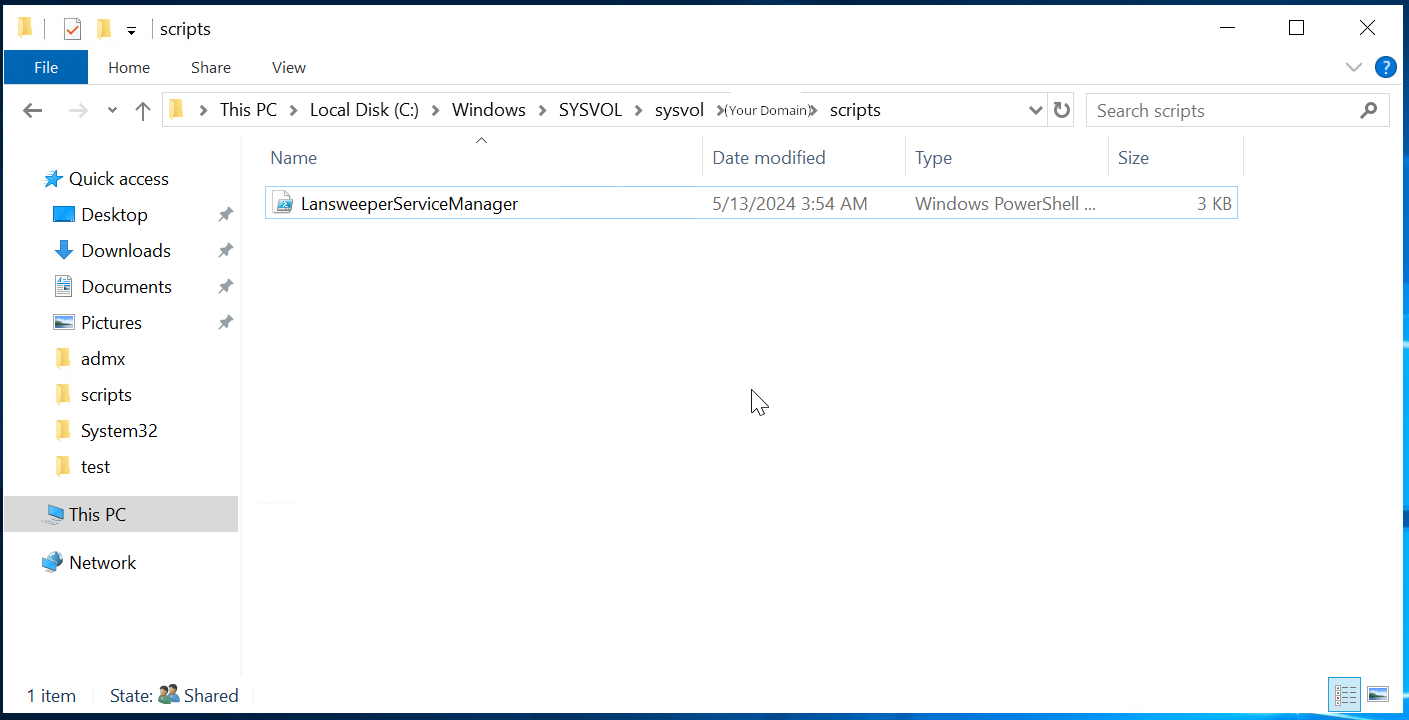
Save the Script to a GPO-Accessible Share
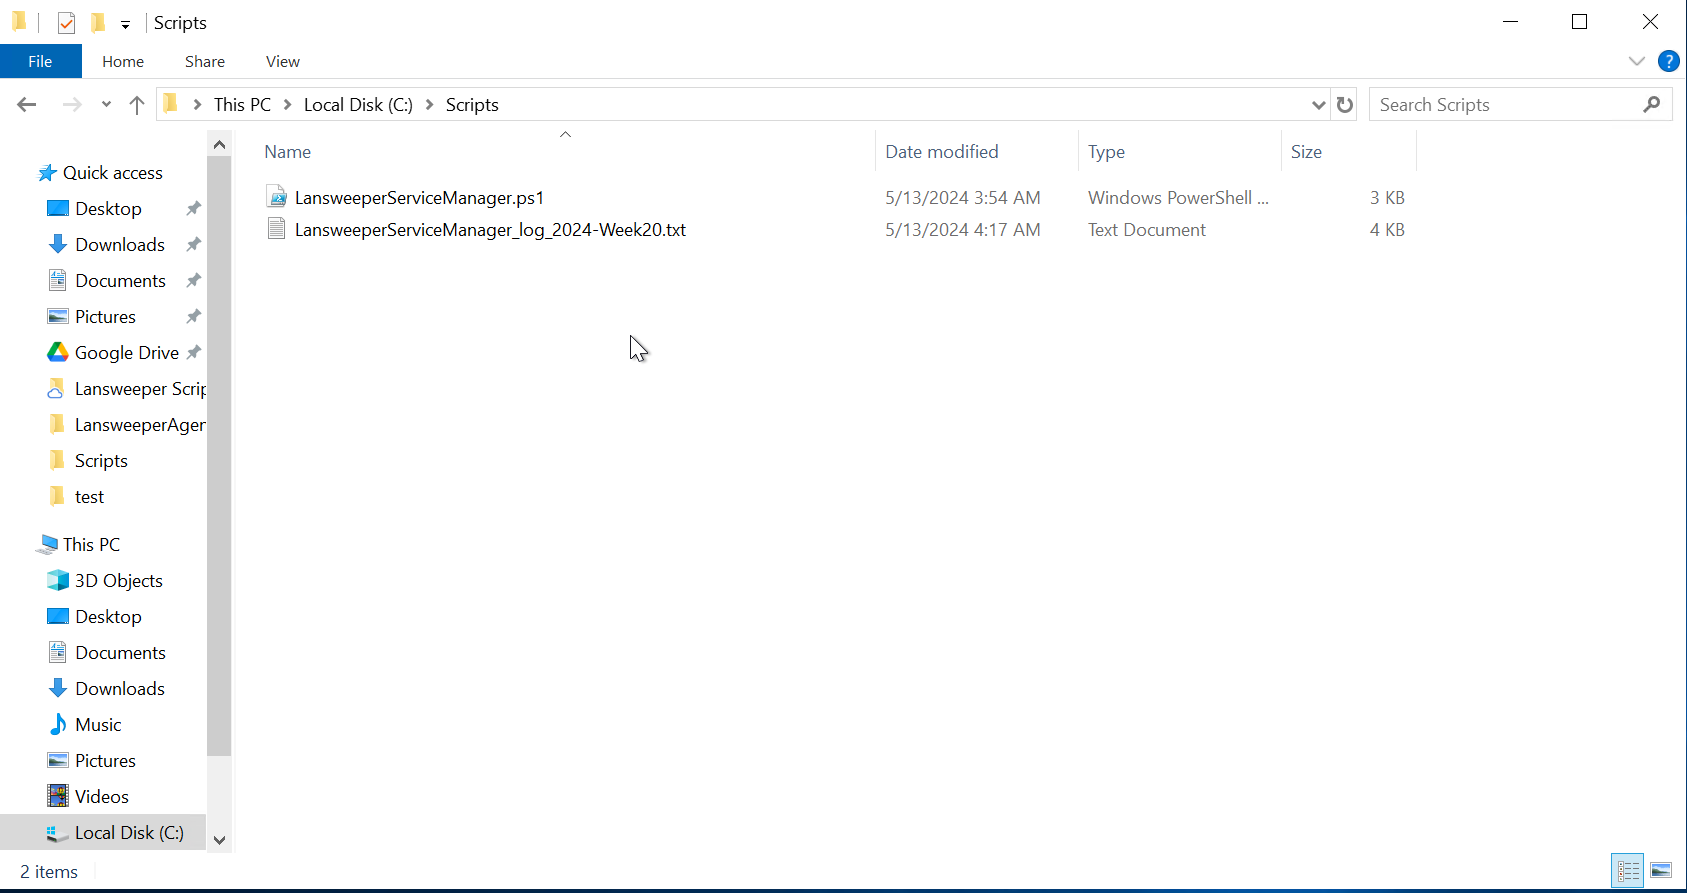
Save LansweeperServiceManager.ps1 on a network share accessible by all domain users, such as \\YourDomain\Netlogon. The physical location on a domain controller should generally be %SYSTEMROOT%\SYSVOL\sysvol\domain.name\scripts.
Locally Test the PowerShell Script
Testing the PowerShell script locally ensures that it functions as expected before deploying it network-wide.
- Open Powershell with Administrative Privileges
- Run:
Set-ExecutionPolicy -ExecutionPolicy Unrestricted -Scope Processto temporarily allow the script to run - Navigate to
C:\Scripts - Run:
.\LansweeperServiceManager.ps1 - Check Log Entries in
C:\Scriptsfor any errors - Check Last Scan date for the asset in Lansweeper
- Set Execution Policy back to Restricted:
Set-ExecutionPolicy -ExecutionPolicy Restricted -Scope Process
Create and Configure a Group Policy Object (GPO)
The Group Policy Object for this example is relatively straightforward and performs three basic actions:
- Creating the C:\Scripts folder
- Copying the .PS1 file to it
- Creating a Scheduled Task to execute it upon user logon. (Adjust the GPO to suit your needs as this is a basic functioning example)
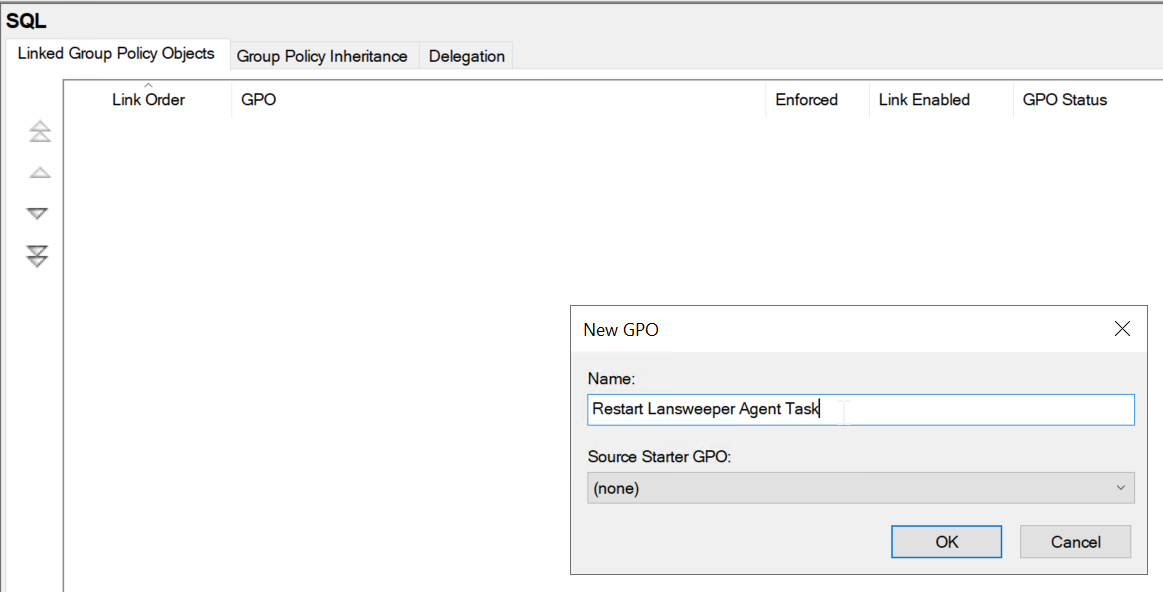
Right-Click on the Organizational Unit (OU) where you want to apply the policy, and choose “Create a GPO in this domain, and Link It Here…“.
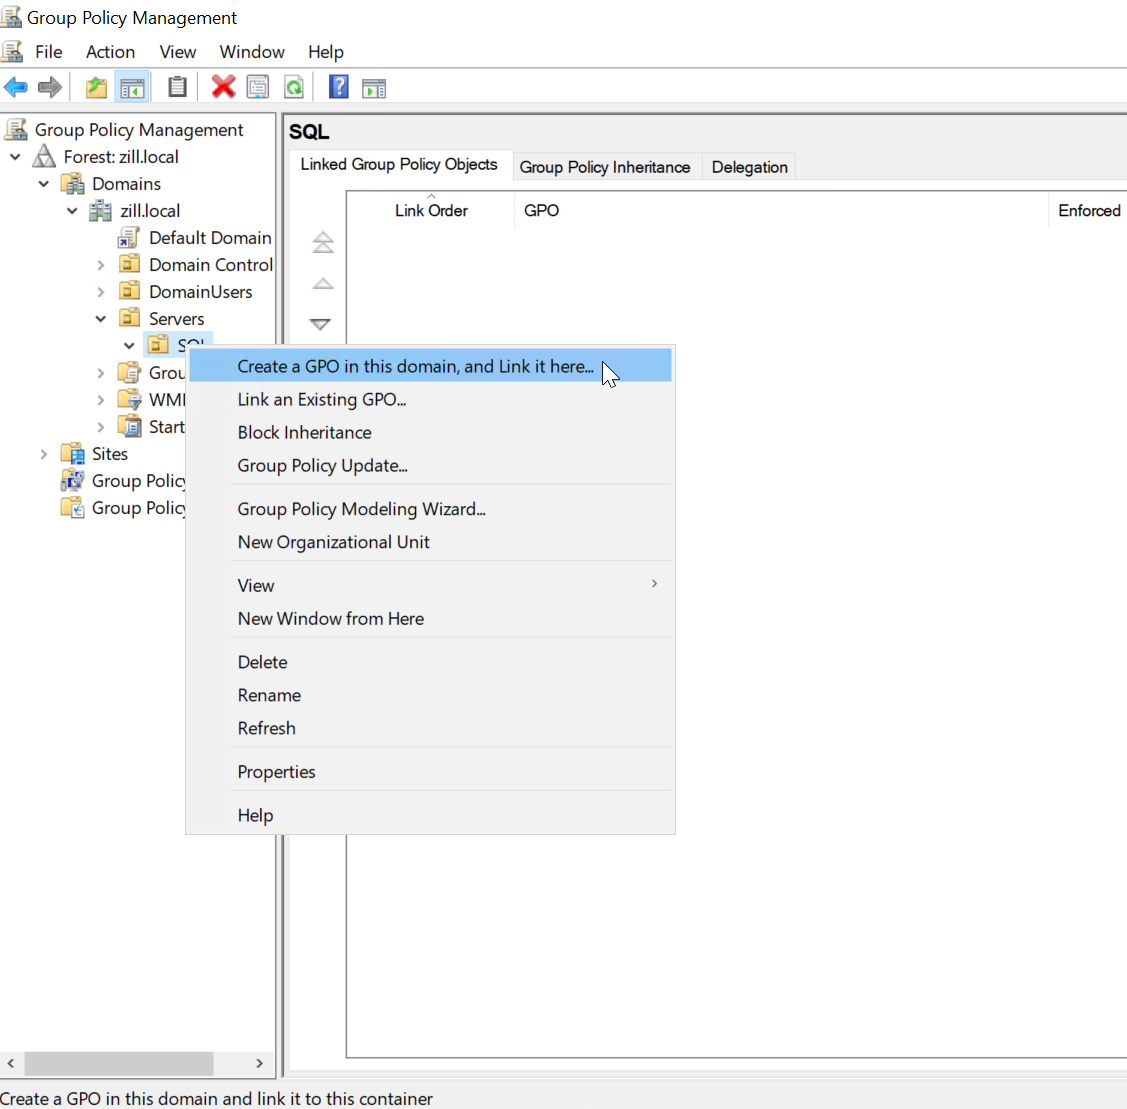
Name the GPO descriptively, such as ‘Restart Lansweeper Agent Task’
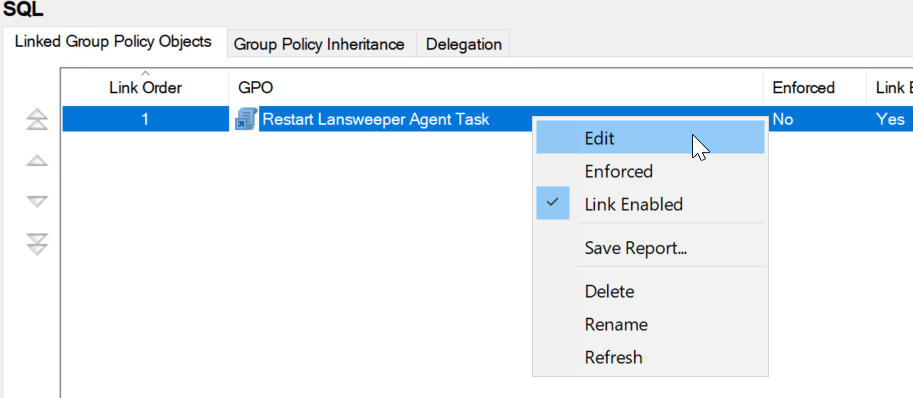
Right-Click the new GPO and select ‘Edit‘ to open the Group Policy Management Editor
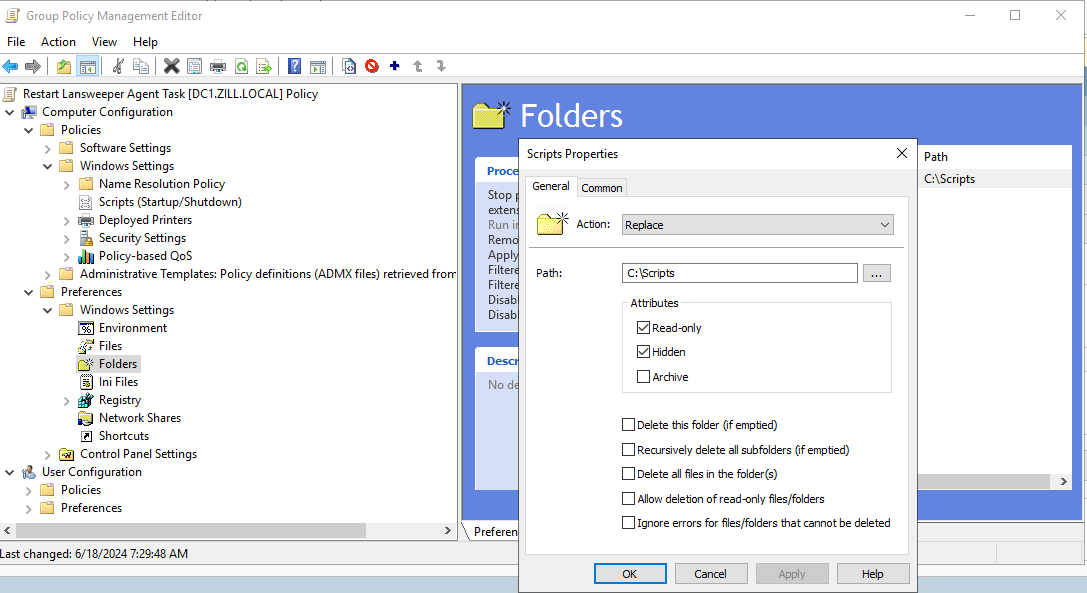
Add the Configuration to Create the C:\Scripts Folder
- Navigate to ‘
Computer Configuration -> Preferences -> Windows Settings -> Folders‘ - Right-Click on ‘
Folders‘ and Select ‘New -> Folder‘. - Set the Action to ‘
Update‘ (or another action according to your needs) - In the Path Field, enter ‘
C:\Scripts‘ - Choose ‘Read-Only’ for the Attribute (and ‘Hidden’ if desired)
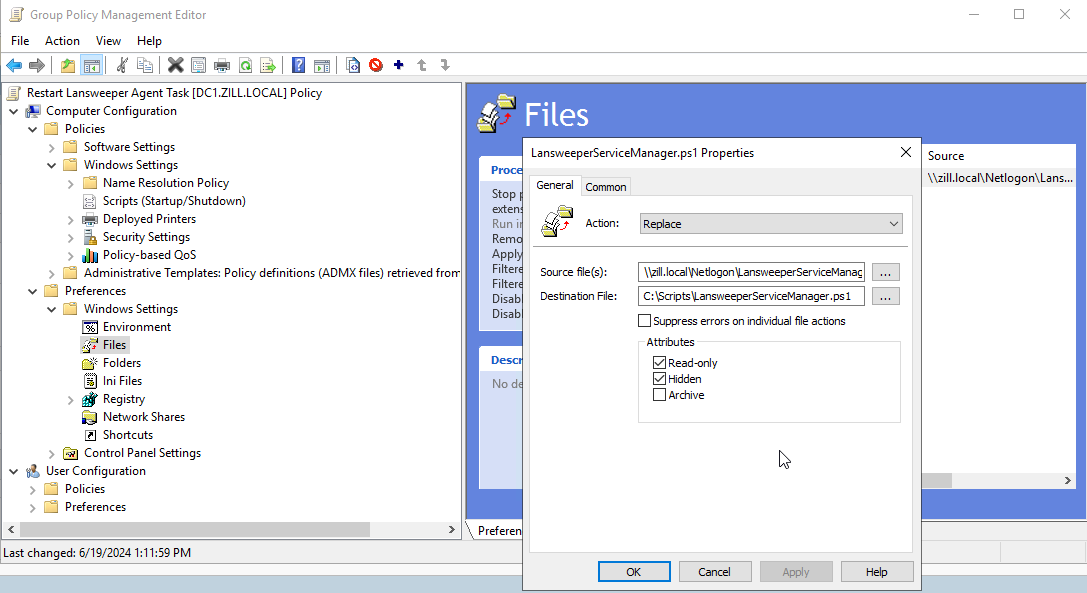
Add the Configuration to Copy the PowerShell Script to C:\Scripts
- Go to ‘
Computer Configuration -> Preferences -> Windows Settings -> Files‘ - Right-Click on ‘
Files‘, Select ‘New -> File‘ - Set the Action to ‘
Update‘ (or ‘Replace‘ if you want to modify the script and push out to applicable endpoints) - In the ‘Source File(s)’ field, enter the network path where the script is stored – example
\\YourDomain\Netlogon\LansweeperServiceManager.ps1 - In the Destination File field, enter ‘
C:\Scripts\LansweeperServiceManager.ps1‘ - Choose ‘Read-Only’ for the Attribute (and ‘Hidden’ if desired)
This ensures that the script is copied from the Netlogon directory to the local ‘Scripts’ directory on each target machine.
Set Folder Security for C:\Scripts Folder and Files
- Navigate to ‘
Computer Configuration -> Policies -> Windows Settings -> Security Settings -> File System‘ - Right-Click in the right pane and choose ‘
Add File...' - Type ‘
C:\Scripts'in the ‘Folder’ input field and press ‘OK’ - Right-Click on the newly created object, and choose ‘Properties’
- Select ‘Configure this file or folder then’ ‘Replace existing permissions on all subfolders and files with inheritable permissions’
- Click the ‘Edit Security’ button
- Set the Folder security as pictured below (I chose the ‘Advanced Security Settings’ to get a better view, and chose to remove ‘Users’ so normal users cannot access the folder, but you can leave it with default ‘Read, Read/Execute, and ‘List folder contents’ if desired)

Add the Configuration to Create a Scheduled Task
- Navigate to ‘
Computer Configuration -> Preferences -> Control Panel Settings -> Scheduled Tasks‘ - Right-Click on ‘Scheduled Tasks’ and select ‘
New -> Scheduled Task (At least Windows 7)‘
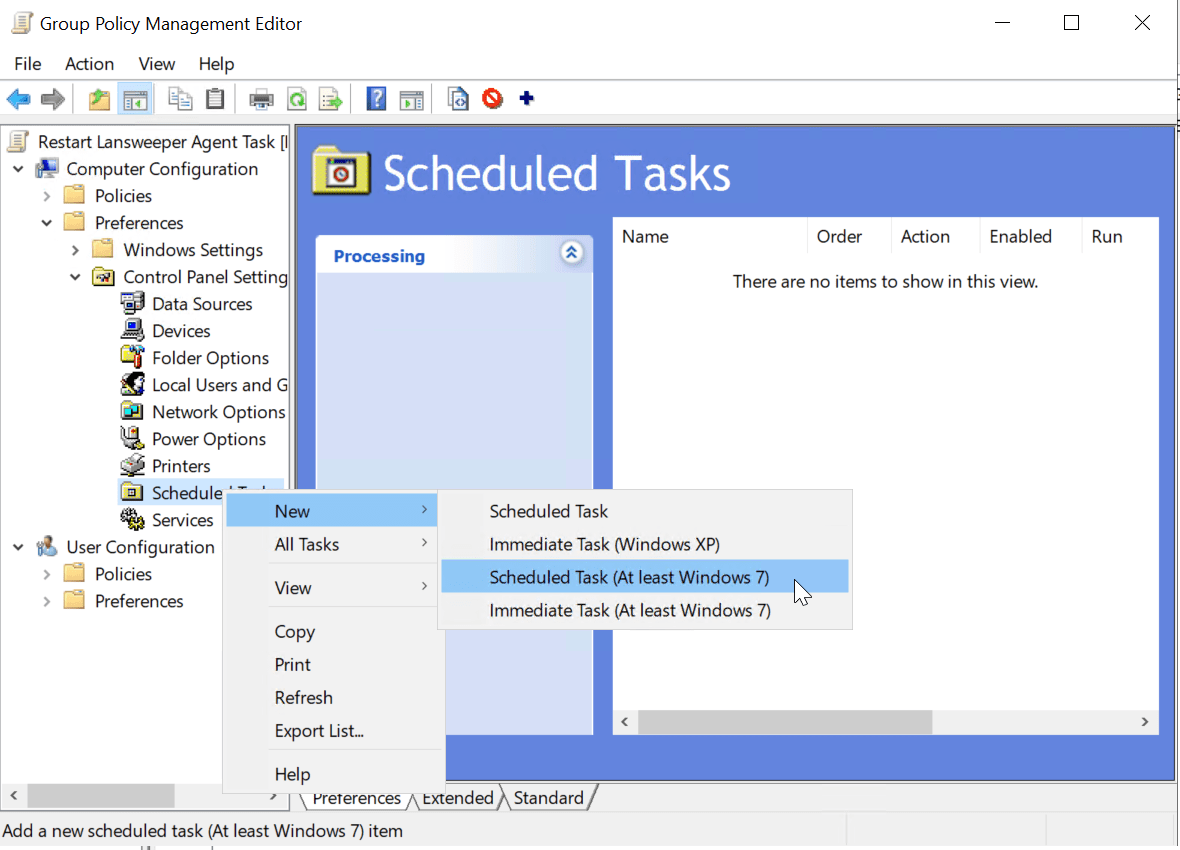
- Name the task (Such as ‘Run LsAgent at Logon’)
- Under the ‘General’ tab, configure the task to run with appropriate privileges (usually SYSTEM)
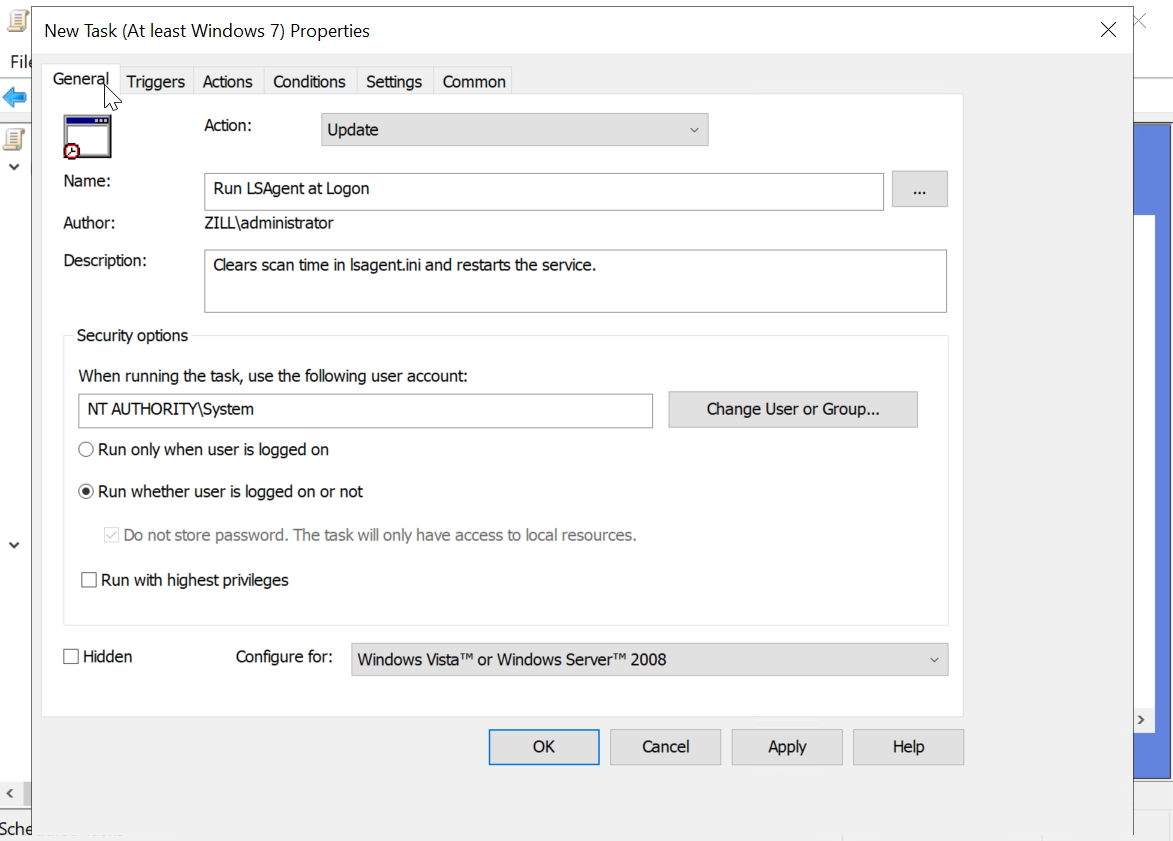
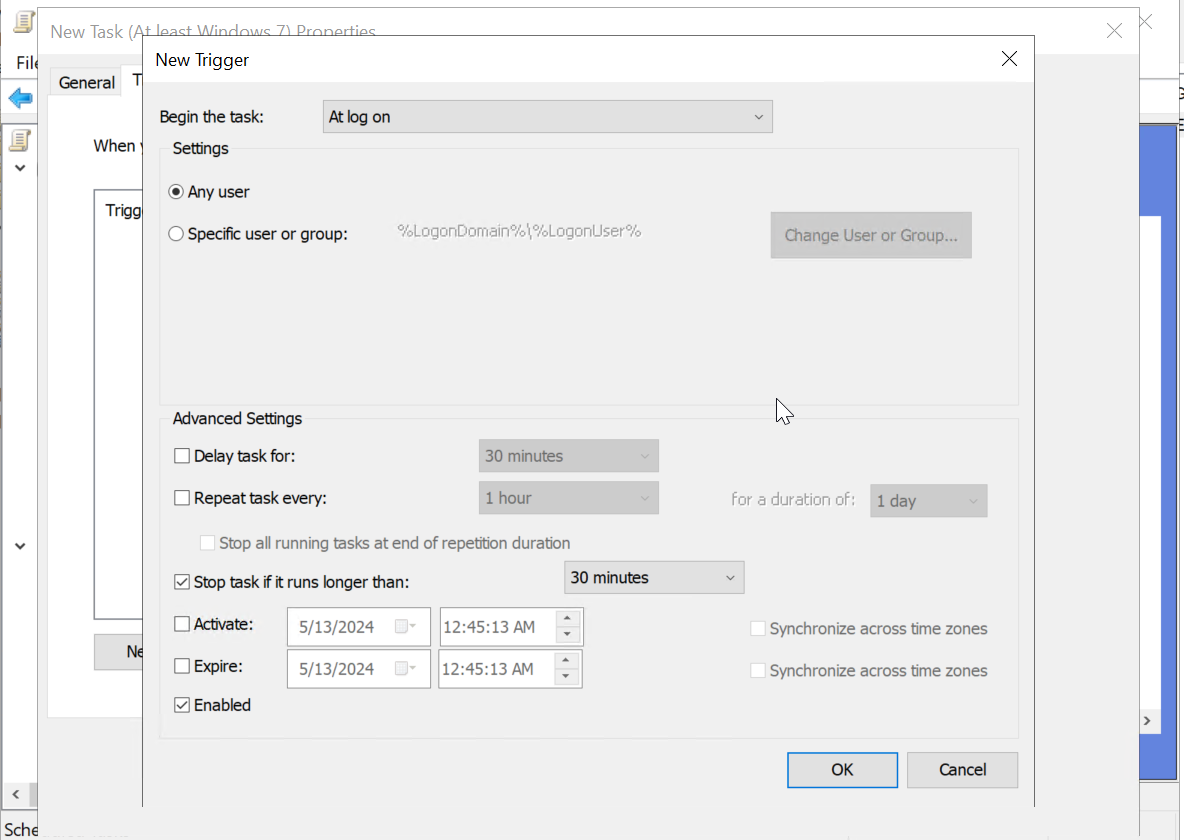
- Set the task to run ‘At log on’
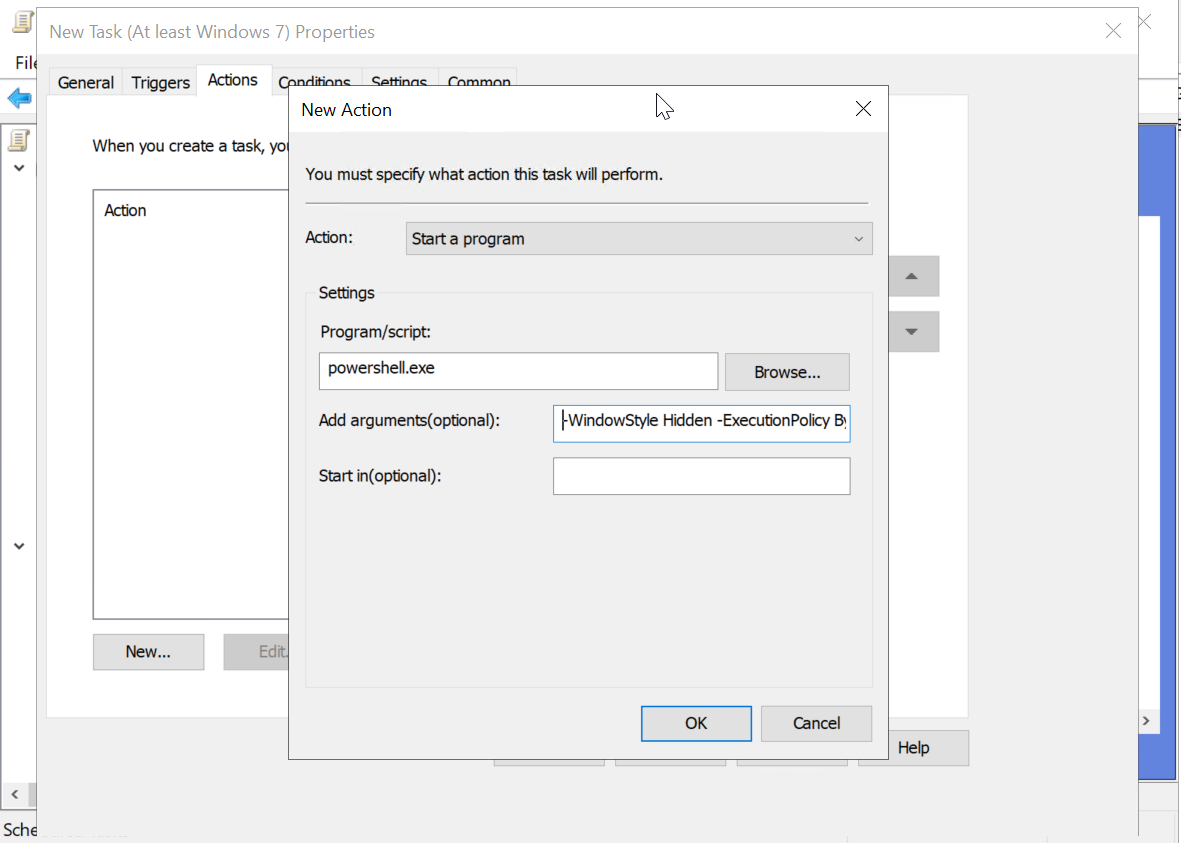
- Under the ‘Actions‘ tab, set the action to ‘Start a Program‘
- In the ‘Program/Script‘ field, enter: ‘powershell.exe’
- In the ‘Add Arguments‘ field, enter: ‘
-WindowStyle Hidden -ExecutionPolicy Bypass -File C:\Scripts\LansweeperServiceManager.ps1‘
Deploy the GPO and Monitor (With a Test Pilot/OU First)
Test GPO on a Target Machine
- On a targeted machine, run ‘gpupdate /force’ from the command prompt or wait for the next policy refresh cycle

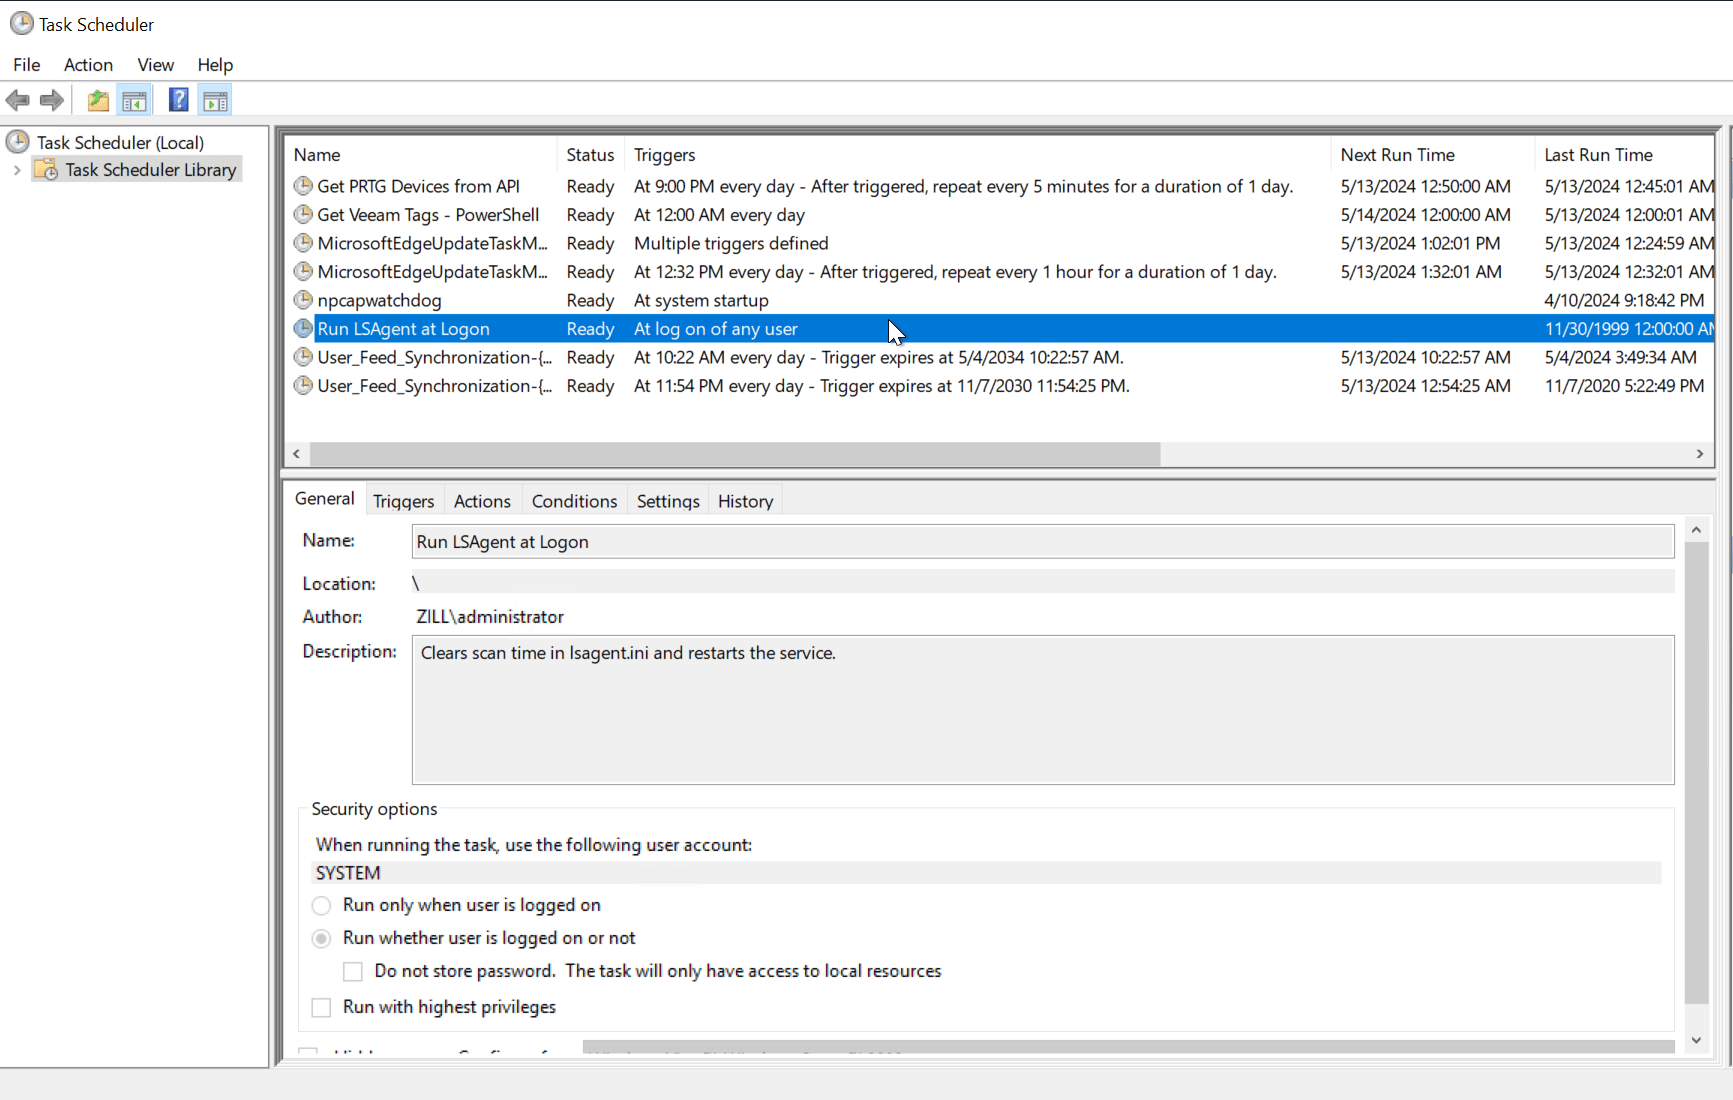
After logging in to the endpoint, check the Task Scheduler to confirm that the new task appears as expected:
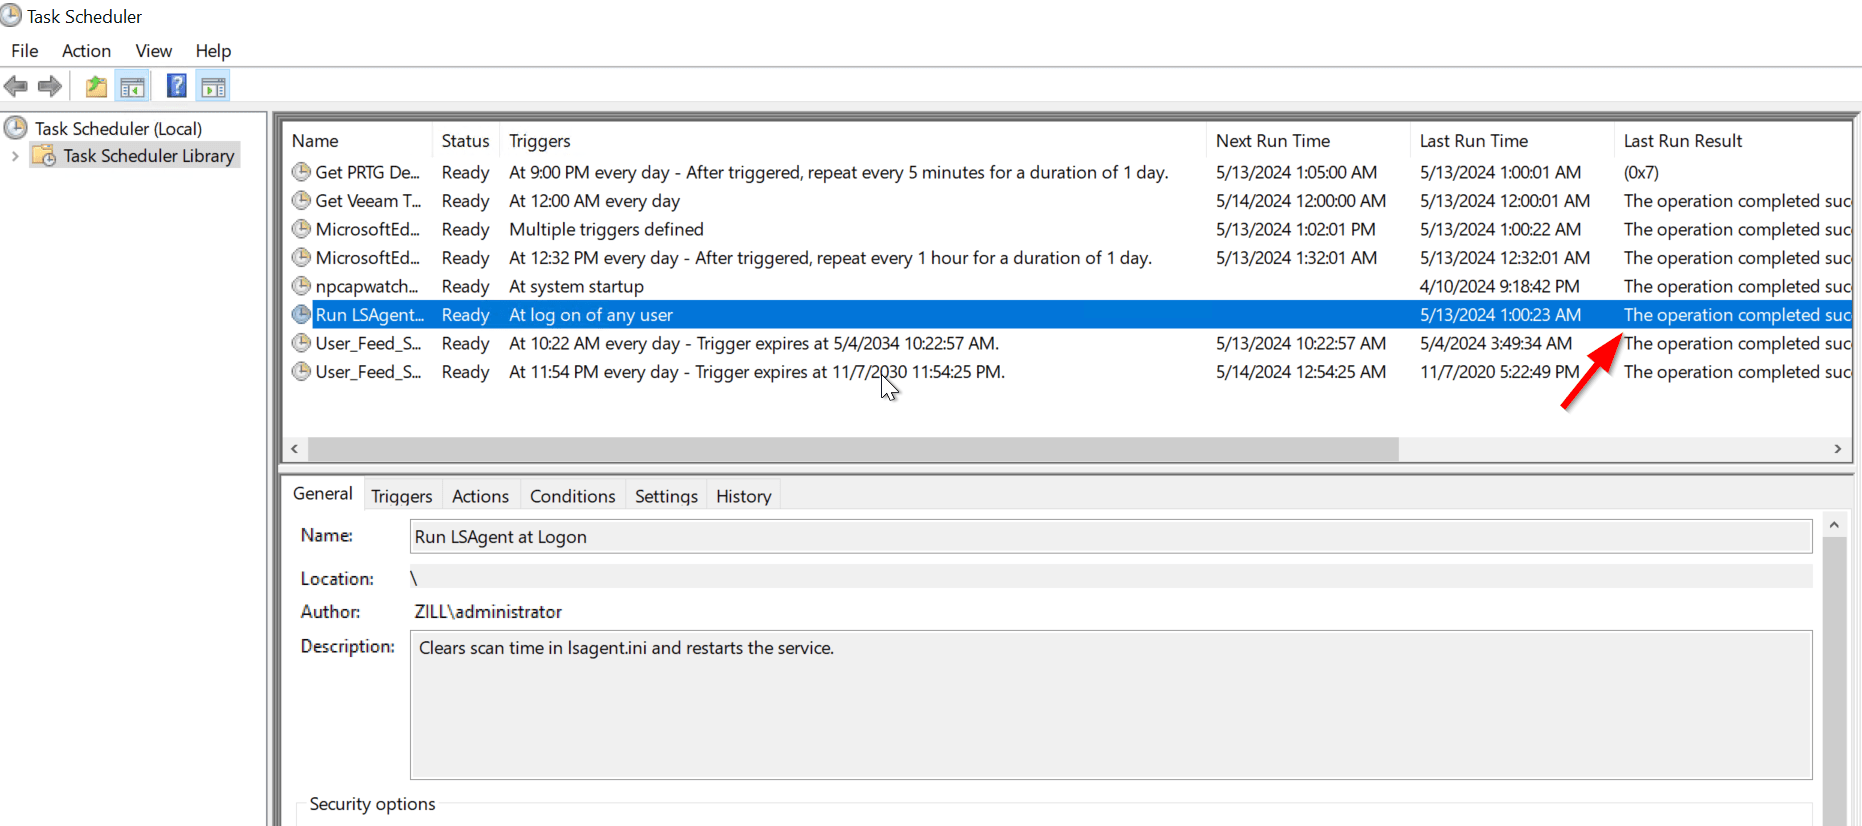
Log off and Log back on again – verify that the task executed by checking the ‘Last Run Result’ for the scheduled task:
Verify that the log file is created, and view the contents

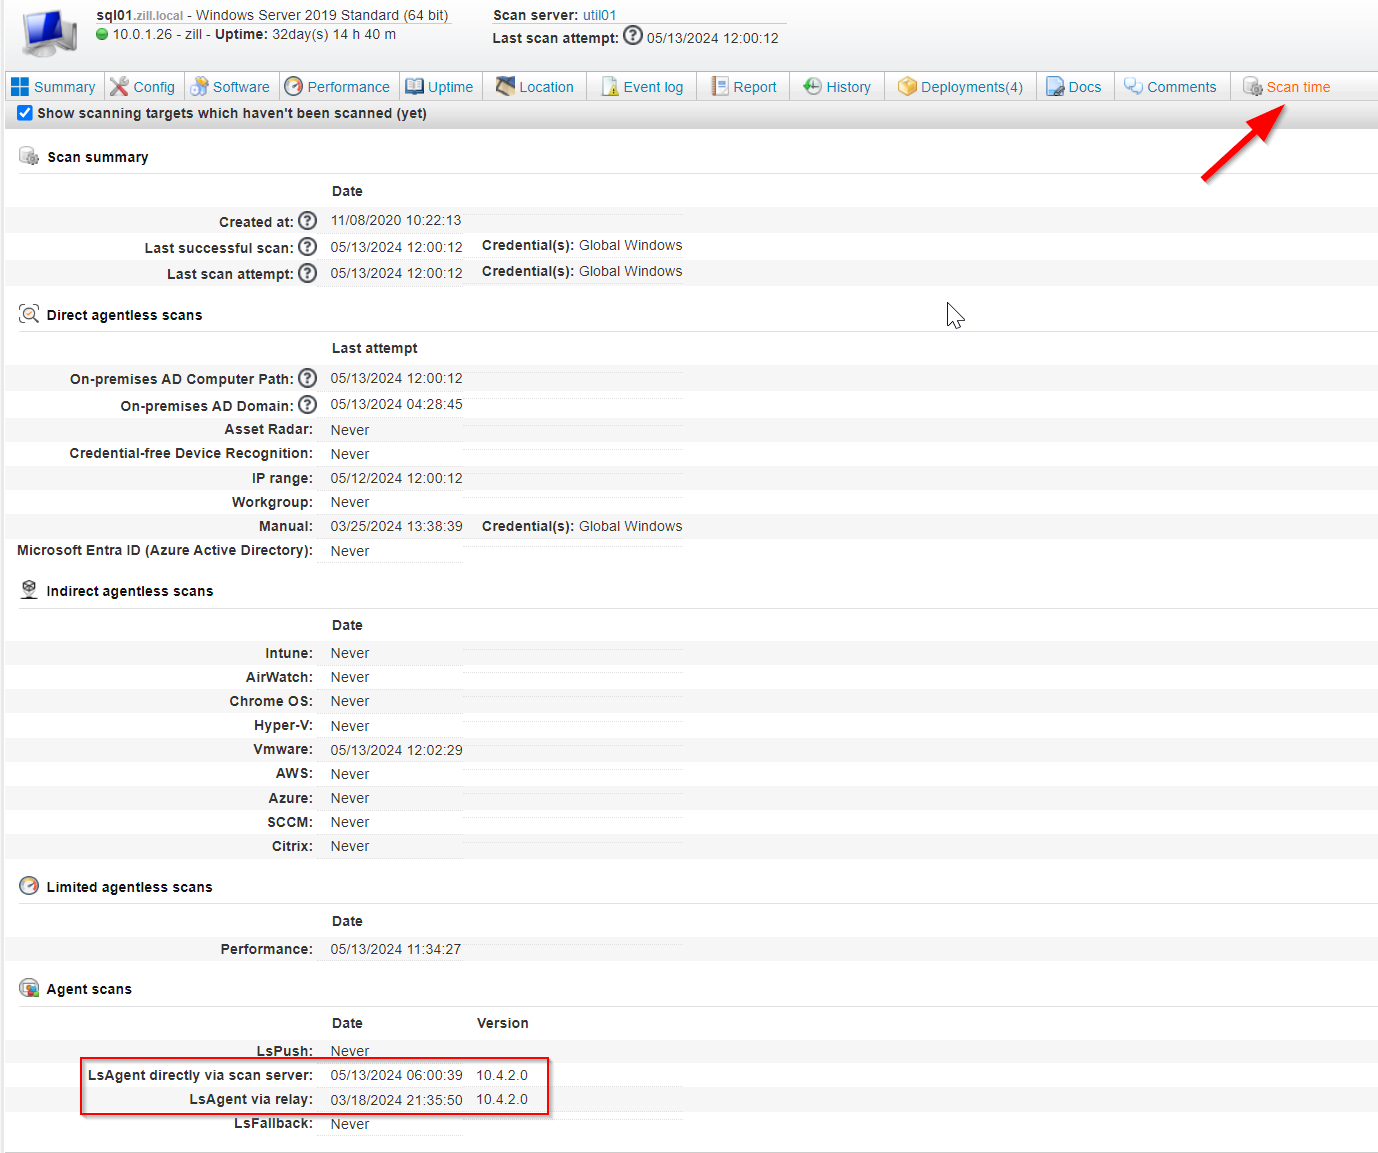
Verify that the LsAgent scan was received by the Scan Server (Scanning off-premise or via Cloud Relay will have a delay as the Scanning Server checks in every 60 minutes to get them)
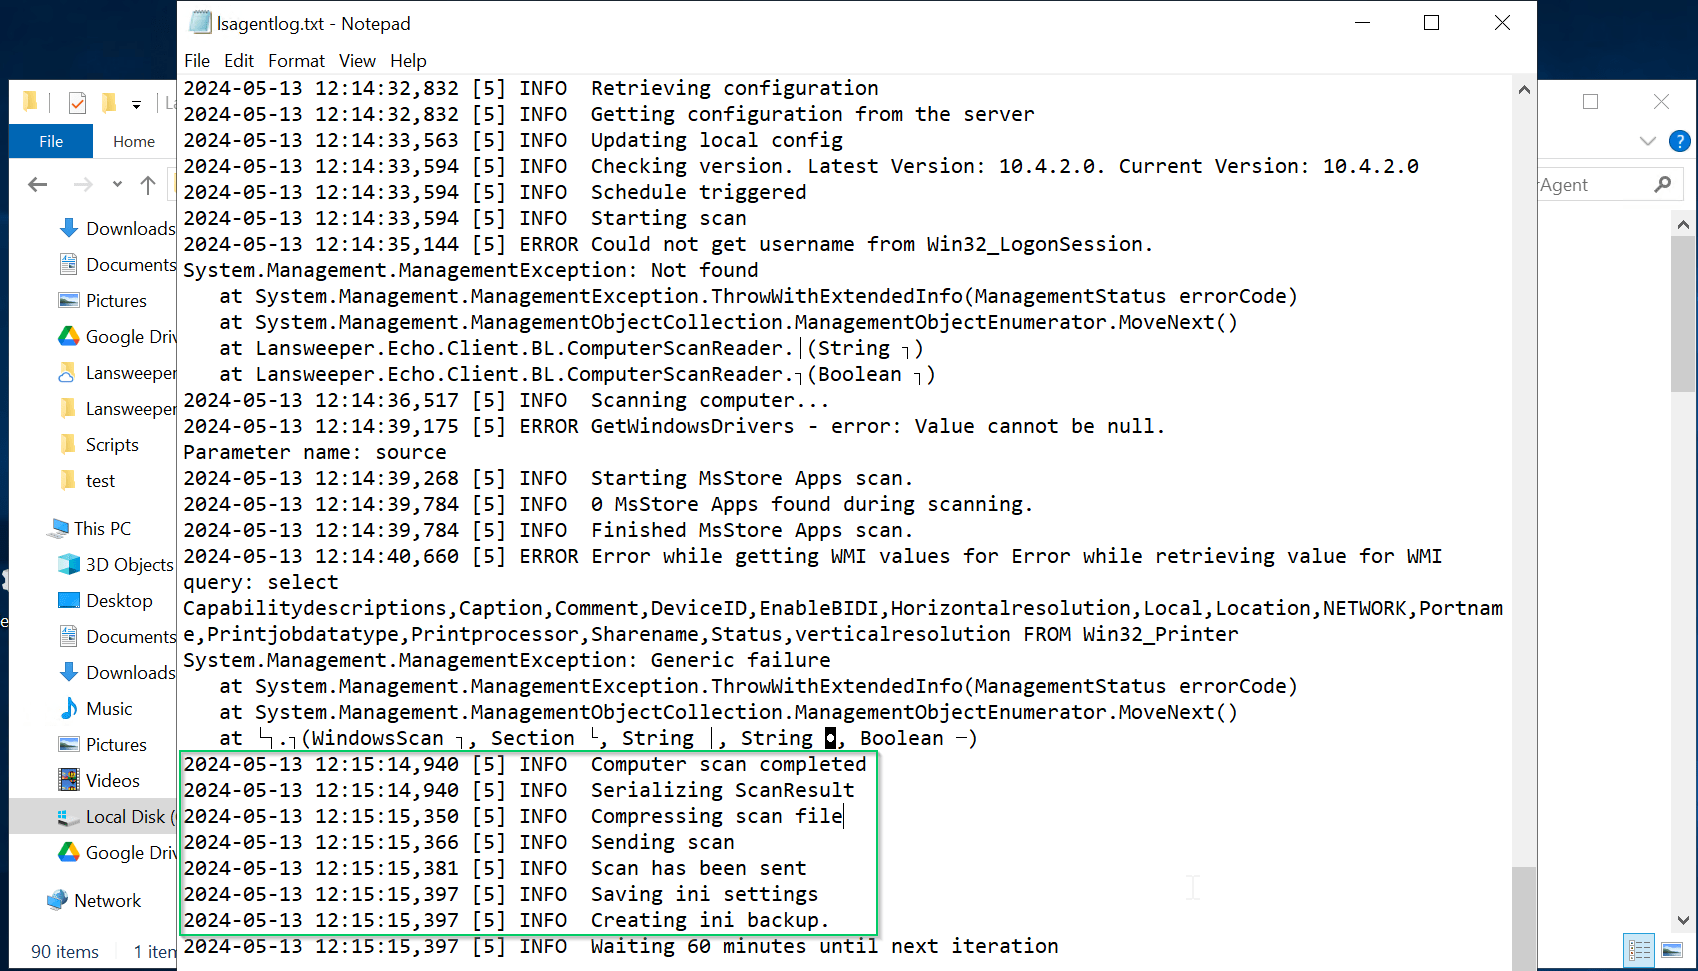
Additionally you can check the lsagent log file for results (C:\Program Files (x86)\LansweeperAgent\lsagentlog.txt)
Useful Reports
LSAgent Management Script Compliance Report – Shows Windows assets with LsAgent, Whether or not they have the script, and shows the modified date of the error log (if it exists).
LSAgent Scan History Report – Shows the LsAgent-based scan history for assets
Windows: User Logons Detected During Scan (Last 7 Days) – Use this report to see all users logged on during each windows scan.
And there you have it – LsAgent now scans at every logon, regardless of if the machine is on the network or off-premise. Happy Sweeping!
-Jacob