- Lansweeper Community
- Knowledge Center
- Knowledge Base
- Reporting
- Use a Microsoft Cloud Services application to send...
- Subscribe to RSS Feed
- Bookmark
- Subscribe
- Printer Friendly Page
- Report Inappropriate Content
- Article History
- Subscribe to RSS Feed
- Bookmark
- Subscribe
- Printer Friendly Page
- Report Inappropriate Content
on
04-13-2021
08:30 PM
- edited on
07-11-2023
08:21 PM
by
sophie
![]()
This page provides instructions on configuring Lansweeper to send emails using Microsoft 365 with modern authentication and a Microsoft Cloud Services application.
Lansweeper allows you to send emails in the context of both the helpdesk module and to send report and event alerts. Since Lansweeper 8.3, Microsoft 365 with modern authentication is supported as a mail provider. To do this a Microsoft Cloud Services application is required.
This article explains what is required to set this up, which permissions to add to your Microsoft Cloud Services application and how to configure your email account in the helpdesk email configuration or email alert configuration.
Prerequisites
- You've already set up your Microsoft Cloud Services application.
- You're in possession of your Microsoft Cloud Services application's Application (client) ID, Directory (tenant) ID, and Client secret.
Add permissions to the Microsoft Graph application to send and receive emails
- Open your company's Azure portal and navigate to App registrations.
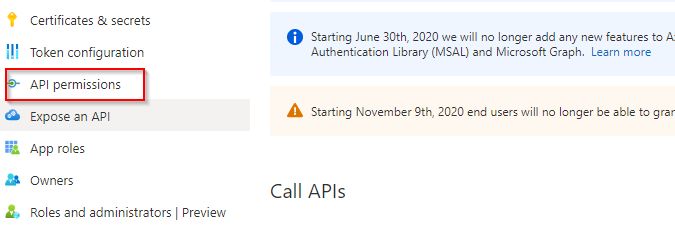
- Select the API permissions tab in the left-hand menu.
- On the API permissions page, click Add permission and select Microsoft Graph from the API list.
- As we are setting up the Microsoft Graph API to enforce modern authentication, you will need to add Application permissions. Start by selecting Application permissions.
- Add the API permissions listed in the table below. These are all required to send and receive emails.
Mail.ReadWrite
Read and write mail in all mailboxes
Mail.Send
Send mail as any user
User.Read.All
Read all users' full profiles
- Once the permissions are added, select Save and double-check that the permissions that are listed.
- Admin consent must still be granted. Select Grant admin consent for <organization> and click Grant in the resulting pop-up.
All added permissions should now show Granted for <organization>
Configure your email account in the helpdesk email configuration
- Browse to the Configuration > Email Settings section of the Lansweeper Classic web console.
- Select Add E-mail account. You can also change an existing configuration by selecting Edit.
- Fill out DisplayName and E-mail address in the General Settings tab.
The email address entered in the General Settings tab will be the email address used for sending and receiving email. - Select the Incoming tab and select Microsoft Graph (REST API) as protocol.
- Fill in the Client ID, Tenant ID, and Client Secret. These values can be gathered when creating the Microsoft Cloud Services application.
- Select the outgoing tab and select the Microsoft Graph (REST API) as protocol. Fill out the Client ID, Tenant ID, and Client Secret, and select OK to save your helpdesk email account.
The Client Secret entered in the Incoming and Outgoing tabs should contain the Secret Value and not the Secret ID.
Configure your email account to send Email Alerts
- Browse to the Configuration > Email Alerts section of the Lansweeper Classic web console.
- Select Microsoft Graph (REST API) as protocol in the E-mail Server section.
- Fill in the From address, Client ID, Tenant ID, and Client Secret. These values can be gathered when creating the Microsoft Cloud Services application.
The email address entered in the From address field will be used to send the Email alerts.
New to Lansweeper?
Try Lansweeper For Free
Experience Lansweeper with your own data. Sign up now for a 14-day free trial.
Try NowNew to Lansweeper?
Try Lansweeper For Free
Experience Lansweeper with your own data. Sign up now for a 14-day free trial.
Try Now


